
Looking for creative ScratchJr Christmas projects ideas? We’ve got two! Learn how to create a decorated Christmas tree or how to dress up as Santa Claus!
Students will practice editing characters and backgrounds.
#1 ScratchJr Christmas project idea – Light up the Christmas tree in ScratchJr
In the first Christmas project idea we will create a Christmas tree lit up with stars.
Children will be able to practice editing existing ScratchJr characters and backgrounds.
Here’s what the finished animation will look like:
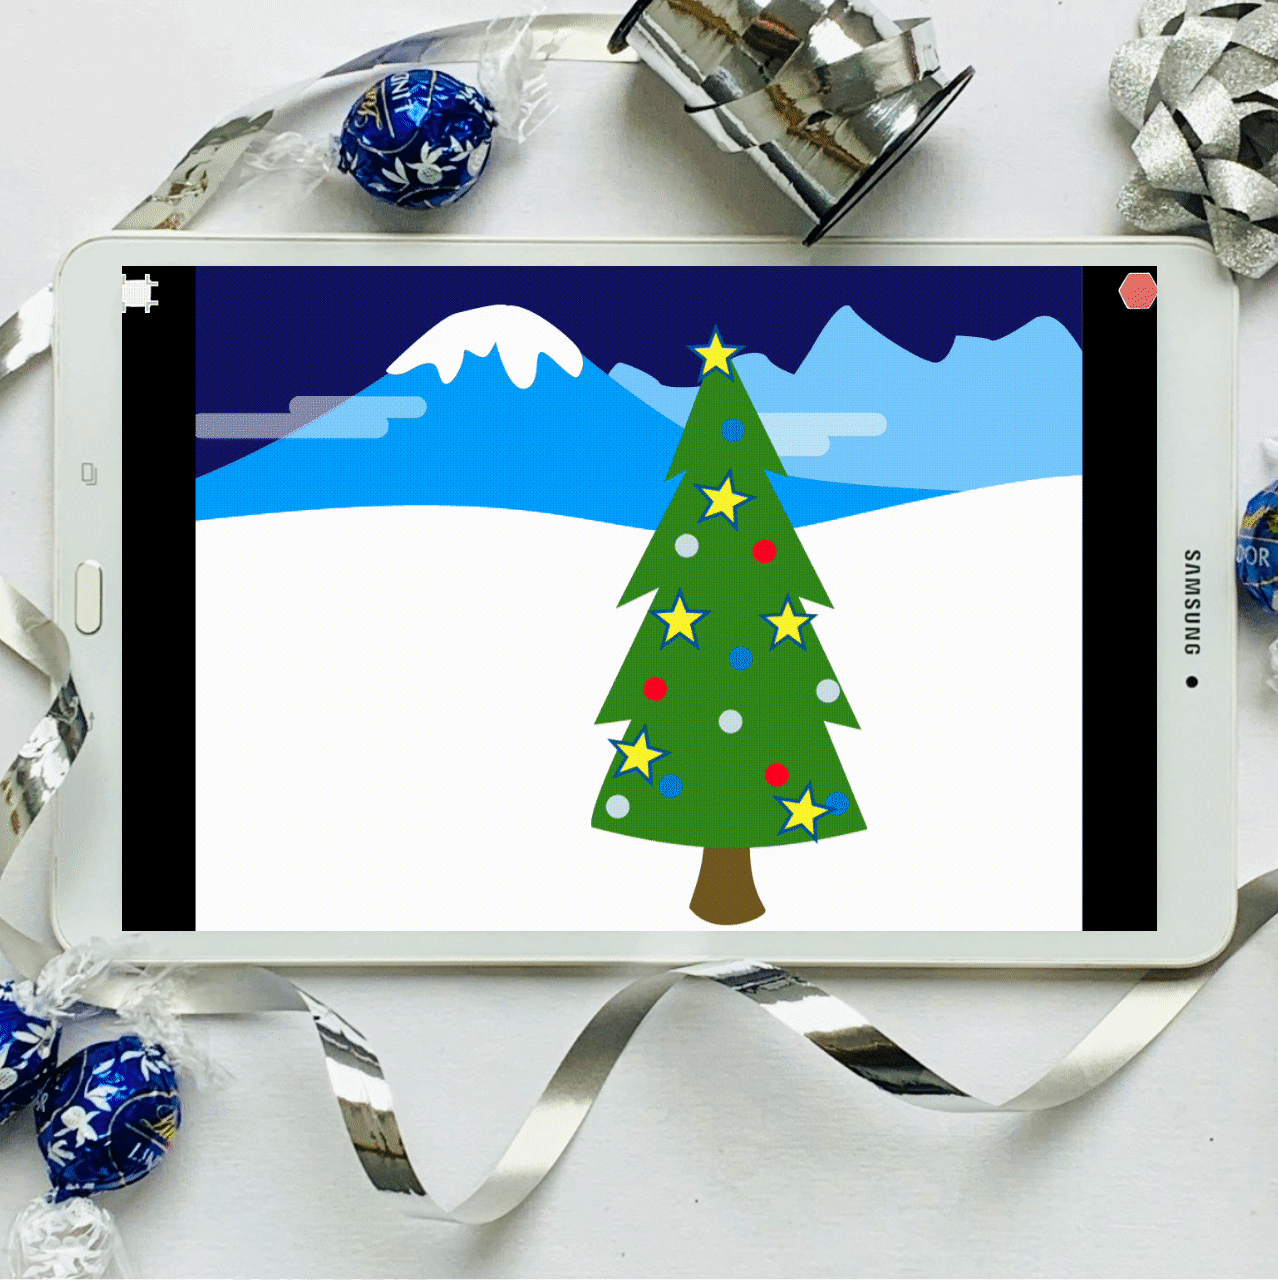
This time, I started my Christmas animation with preparing the background.
I chose the “Winter” background (it is available in the ScratchJr app by default) and edited it.
I used the cut tool to remove trees and a house from the canvas (when in background editing mode, click the scissors icon for the cut tool).
Next, I changed the colors of the mountains and the sky. I wanted to make it look more like a winter night 😊


Then I added the “Tree” character to the project and edited it to hang some Christmas balls.
To draw a perfect circular dot, choose the circle shape tool and lightly touch the screen of the tablet.
(Test what happens if you select the square or triangle tool and then touch the tablet screen. It works like leaving the stamps in the correct shape!).

The last step is to light up the Christmas tree with some twinkling stars. I already described this idea in this post.
Add a star character (I also changed the color) to your project and assign it the following script:

You can also add a second script to make the star rotate. You can then easily copy the star (there is no need to add the same character and write the same set of scripts over and over again!)
To copy, simply drag the star from the characters area (left side of the screen) to the appropriate page from the list on the right:

As a last detail, I added the Shooting Star character. The Shooting Star moves across the night sky and finally disappears.

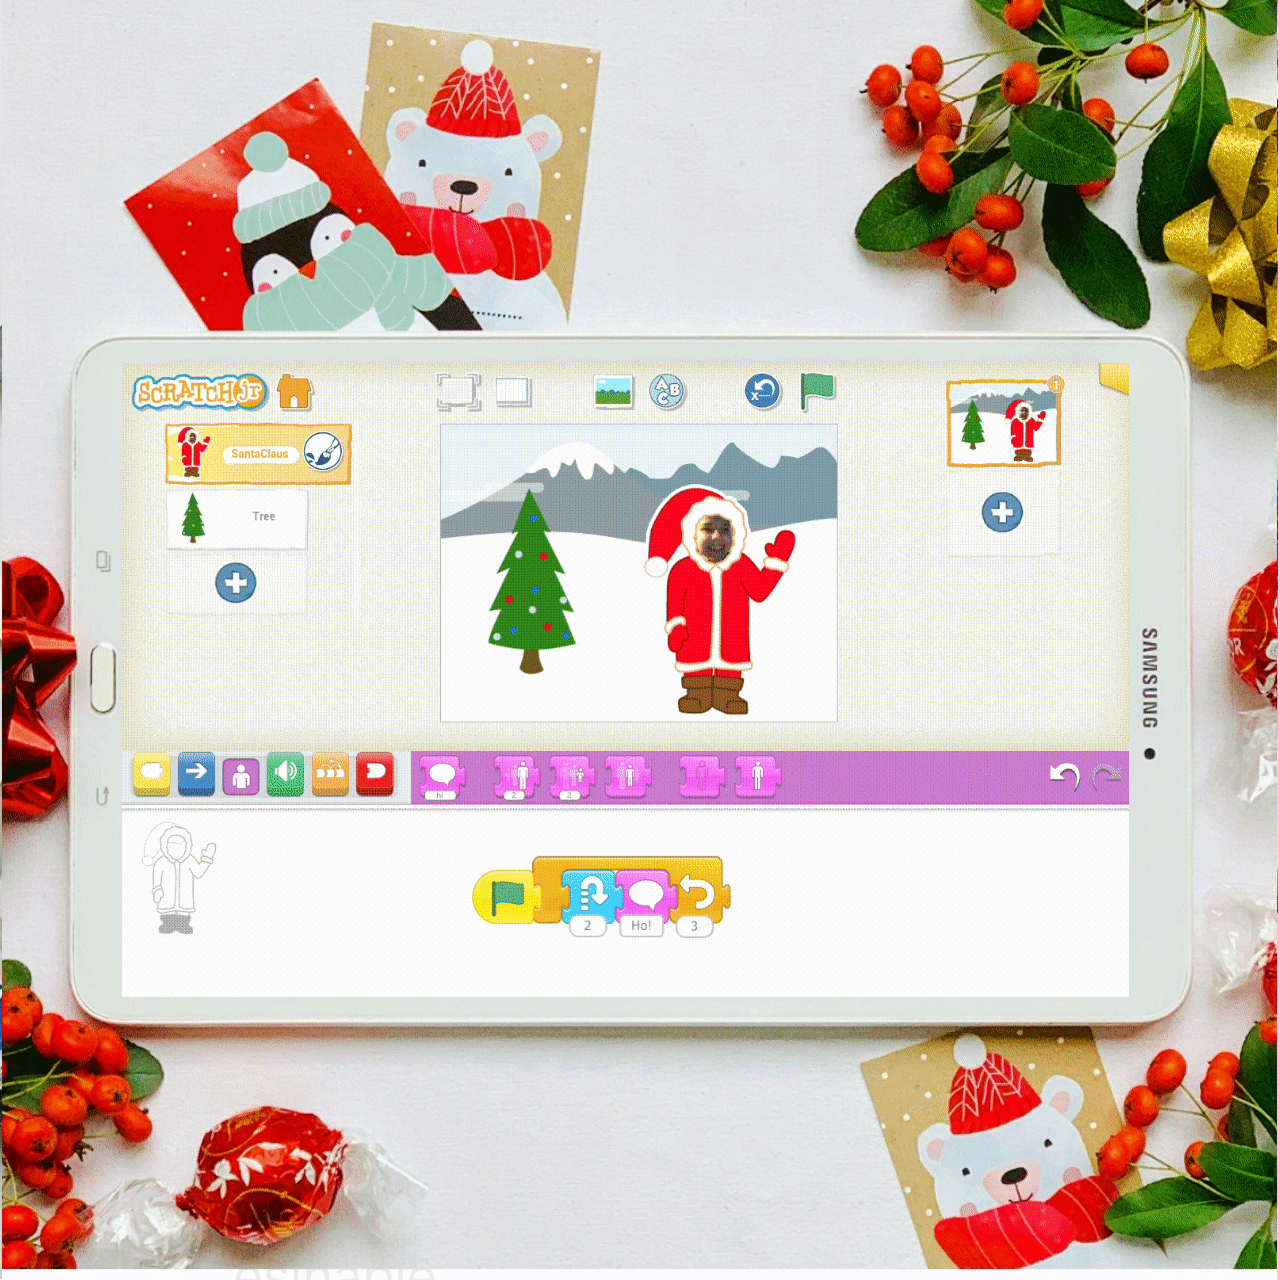
#2 ScratchJr Christmas project idea – Dress up as Santa Claus!
In this fun project students will learn how to edit an existing character and change it to a new one (by adding some additional details). The goal is to create a Santa Claus character.
We’ll start from the default ScratchJr “Northerner” character.
First, I changed the color of Northerner’s coat to red (I also changed the stroke color to dark red and color of the fur to snow white).


The next step is to add Santa’s hat.
This is quite easy – move your Santa a bit to the right side and draw a red hat. Then, move the Santa “on top of the hat” so that it covers it nicely.


Finally, students can add their own photos in place of Santa’s face.
When your Santa character is ready, place it on the winter background and add scripts of your choice to animate it… let your imagination run wild, this is Christmas time! 🙂
How do you like my ideas for ScratchJr Christmas projects? Please let me know in the comments 😊
Also, if you want to learn more about tricks in ScratchJr paint editor, check out this post Creating irregular shapes by dragging points
I wish you a wonderful Christmas!🎄🎅🏻🎁✨❤️
Nice
Thank You!❤
Nice website 👍
Hi,
Thank You for your comment!❤😊
Hi, Im doing this project with my daughter, could someone please tell me how can a put her own picture in santas face?
Iv downloaded the projects but I’m unable to open them.
hi
I love Christmas
We wish you a merry Christmas oh midnight
1Christmas model
Do not worry my friend
Great project! My second graders will try it tomorrow. I just made it and they will def have fun. Just couldn’t figure out how to change the size of the tree to start out bigger than the choice given. But I bet my students will know how. 😉